Inspector
Turn a selection of records into a focused curation task.
Open the Inspector and choose your selection
The Inspector is a curation workspace beside your Archive results. Use it to review one copy, compare a selection, apply shared corrections, or bring titles into Collections while you browse.
- Use search and facets to find a manageable set of recordings.
- Choose Open inspector beside the browse controls.
- Use the selection controls on the copies you want to work with. List and Details views help you distinguish individual copies when a title has several.
- Check Selections in the Inspector before making a change.
The selection count represents copies. Selecting one copy does not select every copy of its title. When editing title information or Collection memberships, Sides works with the distinct titles represented by your selection.
Use Clear all ... in the Inspector to clear the selection. This is separate from Clear all filters, which changes the results you are browsing. Changing your search, filters, sort, or view can reset the selection. Save intended edits before changing the selection, then check it again before the next task.

- Check the scope. Selections counts physical copies.
- Read the differences. [ varies ] means the selected records have different values.
- Save deliberately. Review title or copy changes before choosing Save changes. Collection memberships use their own Apply changes action.
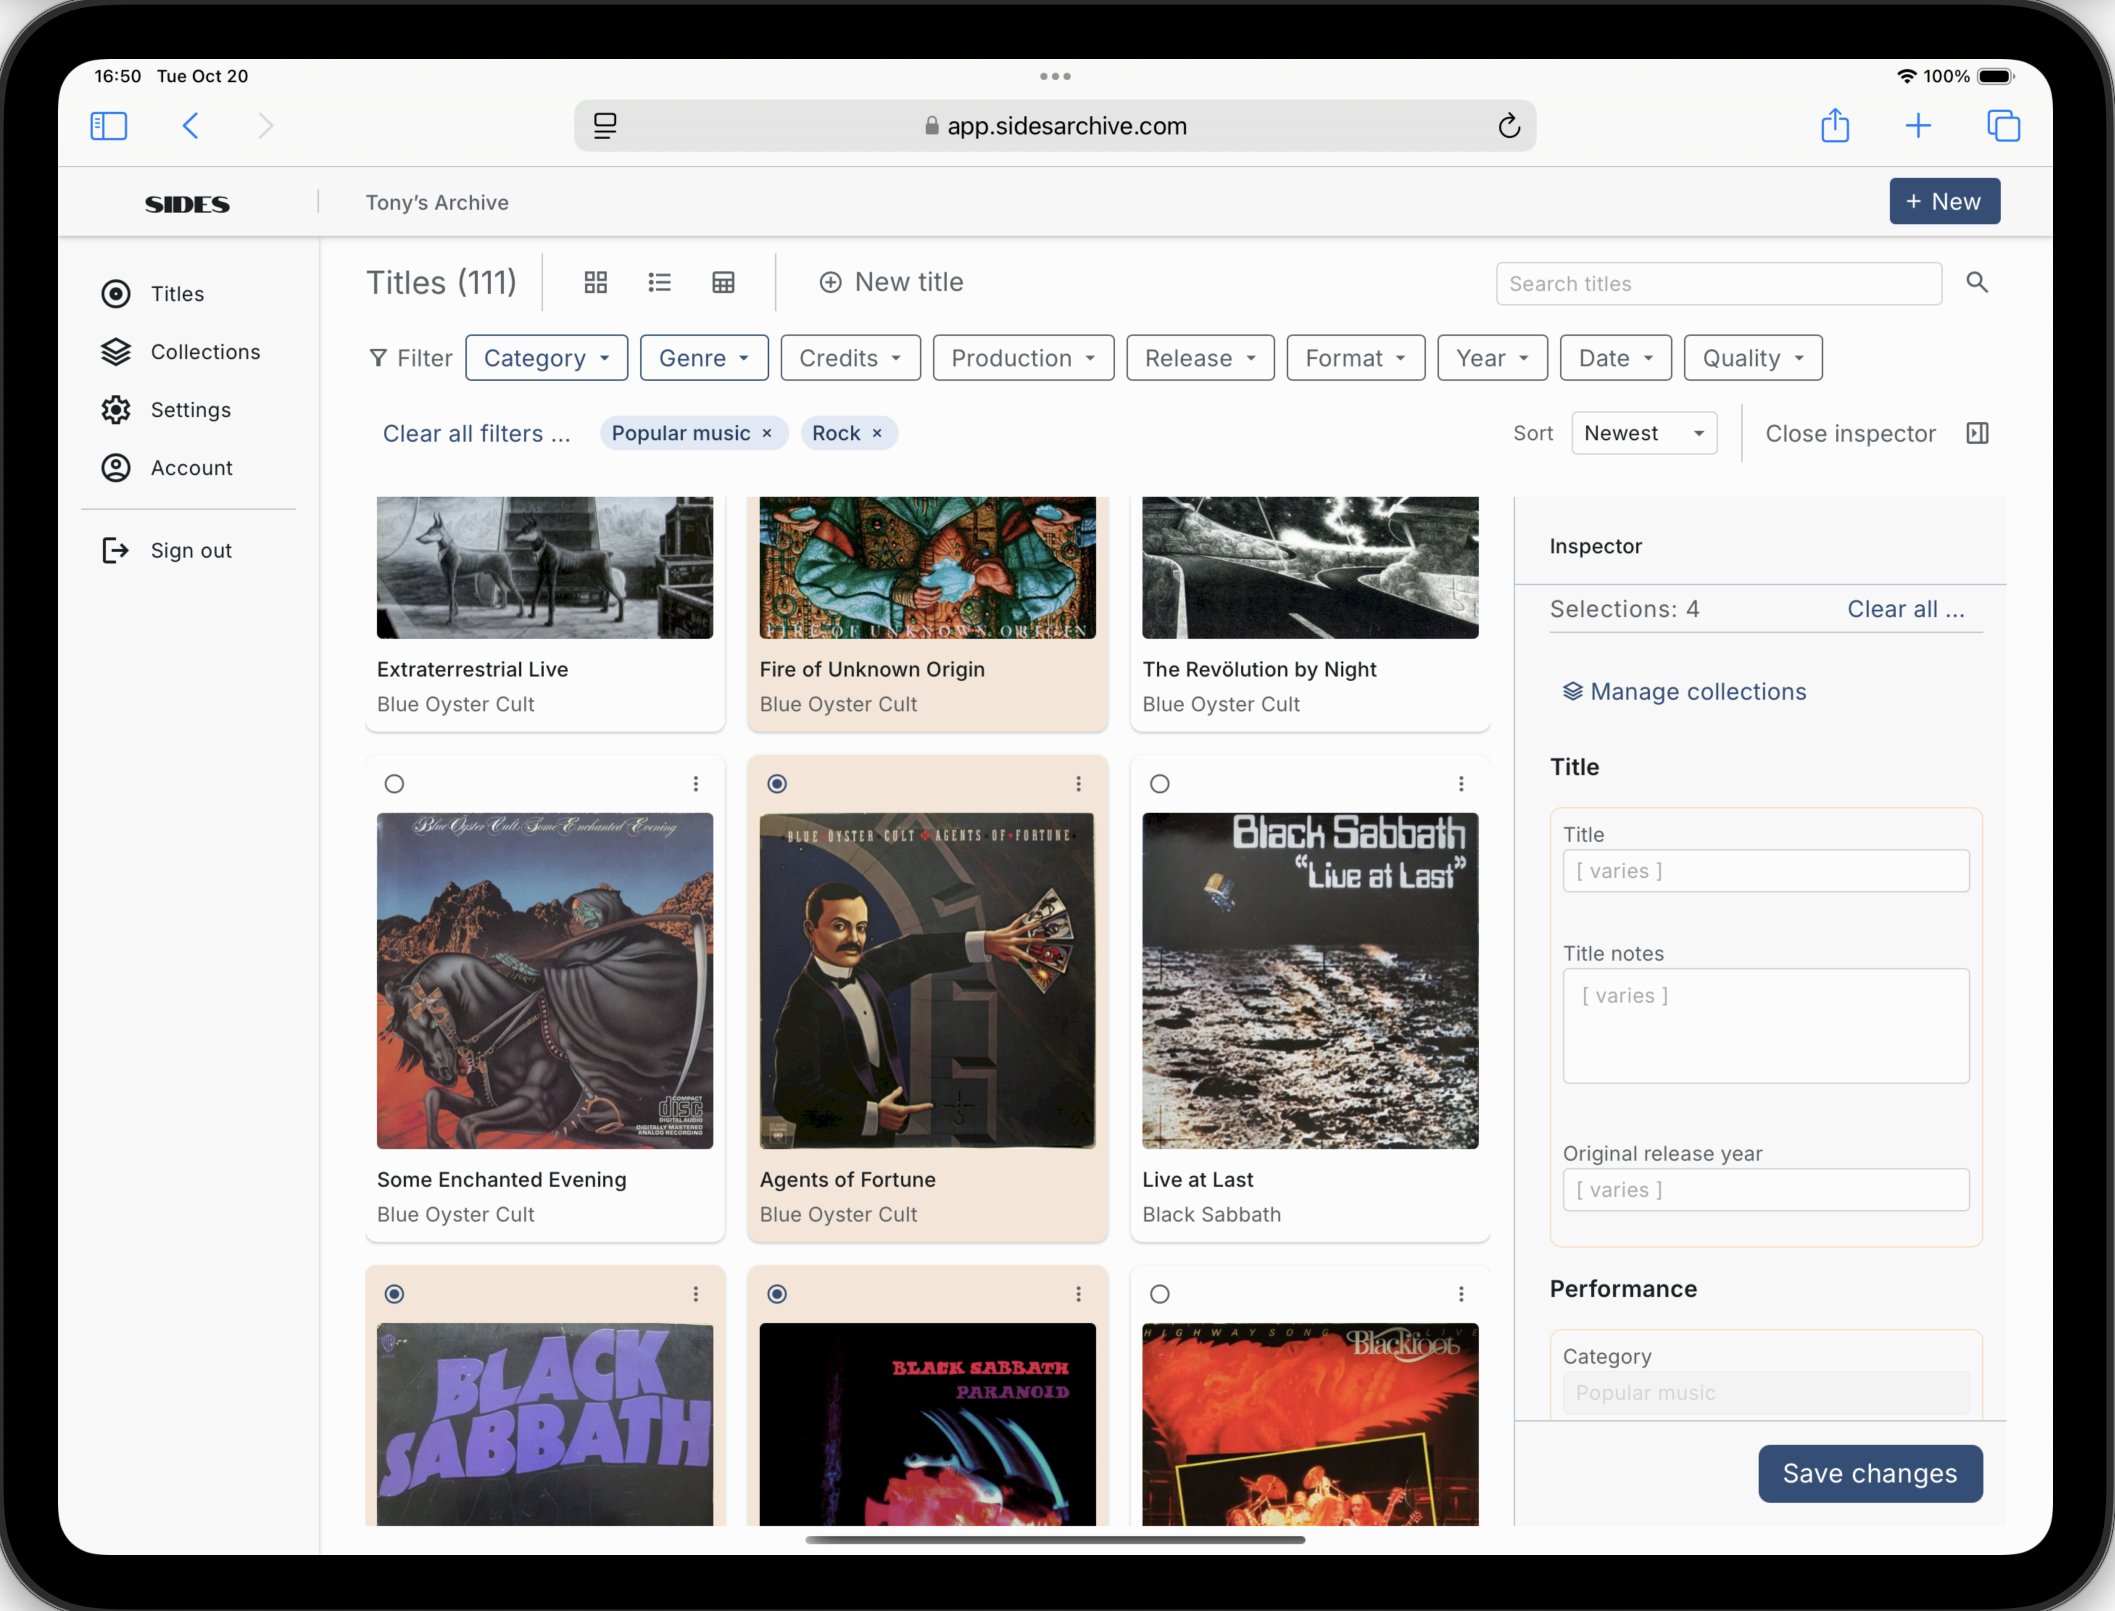
Read shared, empty, and varied values
With one copy selected, the Inspector shows its details and its title’s shared information. With several selected, it summarizes their values so you can see what agrees and what needs attention.
- A shared value
- The selected records have the same value for that field.
- An empty field
- The selected records have no saved value there.
- [ varies ]
- The selected records differ. Some may have a value while others are empty. This is a summary of their differences, not text stored in your records.
- A read-only field
- You can inspect the value, but cannot change it here. Category is read-only.
Leave a varied field untouched to preserve each record’s individual value. Entering a replacement means applying that value to the relevant selected records. For a list field, such as contributors or sub-genres, review the complete set you want saved; treat editing it as replacing the set rather than simply appending a name.
Choose title changes or copy changes
Decide which kind of information you are refining before editing. The Inspector keeps the same title and copy distinction as the rest of Sides.
- Title changes
- Shared recording information, such as the title text, original release year, genre, credits, and title notes. The change applies once to each distinct selected title. Other copies under that title share the updated title information.
- Copy changes
- Release details and facts about the physical copies selected, such as format, label, copy release year, condition, purchase details, Location, and copy notes. Unselected copies keep their own copy-specific values.
Save title and copy changes separately. If you edit both kinds before saving, Sides asks you to separate them. Complete one kind of change, save it, and then make the other.
For example, correcting an album’s original release year is a title change. Moving one vinyl copy to “Storage box 3” is a copy change. See Titles and copies for more examples.
Make a focused batch edit
- Select only the copies or represented titles that should receive the same change.
- Review the shared values and any [ varies ] fields.
- Change only the fields relevant to your task, keeping the edits within title information or copy information for this save.
- Review the changed fields. Deliberately clearing an optional value can remove it from every relevant selected record.
- Choose Save changes and wait for the result.
- Check the saved values before continuing with another selection.
Only fields you change are included in the save. Selecting a group or opening the Inspector does not save anything by itself. A replacement value is shared across that batch, so leave individual notes, condition details, and release differences alone unless you intend to replace them.
For example, after checking three copies bought together, you could select them and enter their common purchase date and source. Leave their different grades and notes untouched. A separate title-only pass could correct a verified credit shared by a group of recordings.
Curate Collections from the Inspector
Use Manage collections near the top of the Inspector to change memberships for the titles represented by your selected copies. Selecting two copies of the same title still changes that title’s membership only once. Check the scope message before applying changes.
- Select the copies whose titles you want to organize.
- Choose Manage collections.
- Review each Collection’s state: All means every selected title belongs, Some means membership differs, and None means none belongs.
- Set the Collections that should include all selected titles, and clear those that should include none. Leave other memberships untouched.
- Choose Apply changes to save memberships, or Cancel to discard that membership draft.
Collection changes use their own Apply changes action. They are separate from the Inspector’s Save changes action for title or copy details.
Removing membership keeps the titles and copies in your Archive. To create a new Collection first, follow Create a Collection, then return to your curation task.
Three useful curation workflows
Work through missing information
Use an available Not set facet to find missing optional information. Inspect the results, select only the records for which you have reliable evidence, and fill in a shared value. Review remaining differences individually.
Record a physical move
After moving records or CDs, select the physical copies you moved. Set Current location in the Inspector and save the copy changes. Copies you did not select keep their own Locations. Maintain your list of places in Archive settings.
Build a group for later listening or research
Browse a useful selection, then use Manage collections to add its titles to a Collection such as “Weekend listening” or “Credits to review.” The Collection gives you a way back to those titles. You choose its membership as your work progresses.
Read the result before the next batch
Selected details saved. confirms a successful save. If Sides highlights an invalid value, correct it and review the intended changes before trying again.
A batch of copy edits can partly succeed. If the Inspector reports Some changes were saved. Review the remaining values and try again., inspect the current records to establish what saved and what still needs work. Make the next attempt against the remaining records you intend to change.
Title edits and Collection membership changes are saved together within their respective batch operations. A failed operation leaves that batch unchanged. Keep title edits, copy edits, and Collection memberships as separate steps so each result is clear.
Before changing your selection or leaving the view, finish or deliberately abandon the current edits. Changing the selection rebuilds the Inspector for the new group; unsaved field edits are not a saved task to return to later.